
How to remove the press on nails
Share
Wearing press-on nails should always be fun, effortless, and damage-free. When it’s time to take them off, the right removal method makes all the difference. At Nailcos, we believe in protecting your natural nails while keeping your press-ons reusable. Follow this gentle, step-by-step guide to safely remove glued-on press-on nails at home.
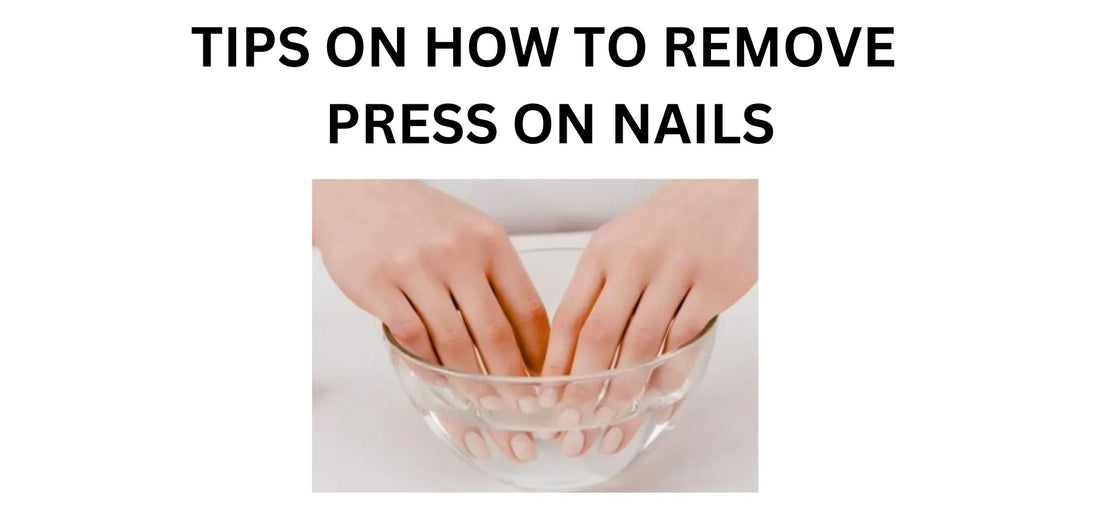
Step 1: Prepare a Warm Soak
Fill a small bowl with warm water. Make sure the temperature is comfortable — warm enough to loosen the glue, but never hot.
Step 2: Add Soap for Suds
Mix in a pump of body wash or dish soap. Any foaming liquid works — the bubbles help break down the adhesive and soften the press-ons.
Step 3: Add a Few Drops of Oil
Add any type of oil you have at home — olive oil, cooking oil, or body oil. Oil adds slip, helping the nails lift off without stress on your natural nails.
Step 4: Soak for 10–15 Minutes
Submerge your fingertips into the warm, soapy oil water for 10–15 minutes. This softens the glue, making removal smooth and painless.
Step 5: Gently Pry with a Stick
Using a cuticle stick, gently insert it under the edge of the press-on. Lift carefully around the sides until the nail starts to loosen.
Step 6: Re-Soak if Needed
If the nail feels stuck, don’t force it. Place your hand back in the water and let it soak a little longer. You can gently create a tiny gap while soaking to help the glue release.
Step 7: Clean & Store
Once all press-ons are off, use a nail buffer or file to clean away leftover glue on your natural nails. If you plan to reuse your set, simply wipe them clean and store them back in your Nailcos box for next time.
Final Nailcos Tip
Finish by applying cuticle oil or hand cream to rehydrate your nails. With this simple routine, your press-ons stay beautiful and your natural nails stay healthy.